Thursday, September 5, 2013

Call It An Indefinite Hiatus

To anyone who reads this blog with any regularity, I apologize for not publishing with any regularity at all. In my defense, I just recently obtained my bachelor's degree in a fit of productivity and then proceeded to sit on my bum at my parents' house and not cook anything exciting. Then, I moved to Montana in order to do grad school and now live with three people I found on Craigslist who have a tiny kitchen. I'm not quite comfortable in the house yet, even after a month, so I think that hogging the kitchen and taking pictures of food in various stages of completion could generate unneeded tensions. 
In addition to this, I am at the moment a baker out of flour and sugar, not eggs and butter. 
Still, even when I get flour and sugar, the sixty gen-chem lab reports I'll have to grade each week, the gen-chem lab prep I have to do each week, the lab group rotations (and then the research), and the grad-level chemistry classes I'm taking should keep me way too busy to get elaborate in the kitchen. 
Just so you don't get jealous of me and start demanding that I disclose what I'm really doing, I make a lot of pasta with sauce from a jar, falafel from the dehydrated mix, and far too many peanut butter and jam sandwiches. I make a big (for one person) batch of rice, open a can of beans, and eat rice and beans for a week here and there. I also found highly discounted vegetable flavored vegetarian cup-of-noodles style soup in the damage and final clearance section of a local grocery store, and I'm embarrassingly excited about eating a cup of noodles again. It even has the dehydrated vegetables! And the tendency to collect flavor sediments and carrots at the bottom! And the peas are as bad as I remember! And the broth tastes like yummy salt! Just like in elementary school! Wow! 
These habits will probably continue for a while, since I'm sleeping on an air mattress and my furniture is either boxes or cost less than $10 at Target (a plastic drawer unit for a dresser and a TV tray for my fish). I'd also like a car and to pay it off before I get my PhD. 
So, if I end up living alone or having lots of free time, I might make a post here and there, but the rent is too cheap here and the "free time" thing you speak of? Yeah, I doubt it. 
In the meantime, I refer you to Trina of the Beans, who isn't me but is still witty, vegetarian, and broke/cheap. You can read through her archives and pray that she posts again someday.  
In the meantime, thanks for playing along.

Monday, March 11, 2013

Adventures in Butter

My house had a surplus of unclaimed whipping cream recently, left over from a bridal shower that someone who doesn't live here had.
I made butter, of course.
The first time, I didn't take pictures because it was pretty spur of the moment, so I took pictures the second time around. You can pretend it was exactly the same, but the first time was better because I put a little bit of sour cream to "culture" the ultra-ultra pasteurized whipping cream, acting on the advice of Sally Schneider that cultured cream is far superior to sweet cream. It is. The sour cream was also left over from the bridal shower, though, and it had turned pink by the time I decided to make the second batch. And everyone was out of yogurt, and they don't really sell much creme fraiche in eastern Washington. So just pretend the second batch had culture in it. It looked the same anyway.
I made my butter in old pasta and jam jars (canning jars work as well, I hear). If you have a stand mixer or some kind of mixer thing that doesn't scare the crap out of you and spit stuff everywhere, you can just turn it on and leave it until it makes butter.

I started with about a cup of cream; it doesn't really matter unless you have a specific amount of butter you need. This made 4-5 tablespoons of butter. If you have cultured milk products, put 1 tsp of stuff in with the cream. If you're using creme fraiche, try half and half like the recipe says and tell me how it works. 

 It expands as it turns into whipped cream; this picture is about 5 minutes in.

 It takes a while to get through the whipped cream stage.

 This is for sure whipped cream at this point. Whipping cream goes through whipped cream to butter. It took I want to say 15 minutes of shaking, excluding the breaks I took (leave the jar in the freezer for breaks).

 
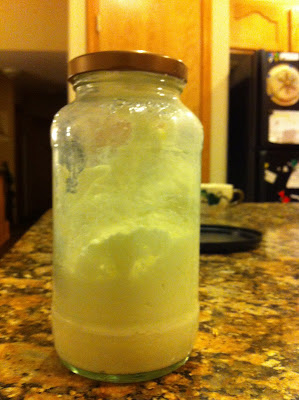
 I think it's butter here; the fat fell out of solution differently with normal whipping cream than with slightly cultured whipping cream. With the cultured stuff and a smaller jar, it sort of thumped out. This one kind of slid out without me noticing, but it was definitely butter when I tested it.

Butter and buttermilk
 Next, you strain out the buttermilk, which is fantastic and you should save that, and plop the butter into a bowl of ice water (no icecubes, please, but you can use them to make it cold). From there, you knead the butter to get the buttermilk out. A spatula is an excellent tool here.

You leave a lot of butter behind when you knead it, at least I do. The clean butter is placed on a plate and chilled for a bit in the freezer, and then you can add salt or put it in the fridge. If you used a little more than a cup and don't salt it, you should have the exact amount needed to make half of Smitten Kitchen's Favorite Buttermilk Biscuits. You'll also have the exact amount of buttermilk needed.
The biscuits are delicious.

Monday, November 26, 2012

Apple Cider -- Holiday Food No. 1

The holidays are upon us! After spending last Christmas alone in my flat in England, except for when my roommate sneak attacked me and brought her parents (visiting from Germany for the holiday) over, I'm really excited to be home this winter. We decorated the tree at my parents' house, and my housemates are beautifying our house and planning holiday fun times. I bought a Christmas-y shirt. This got me thinking about holiday foods, especially ones that I tried to collect last Christmas when I was trying to recreate home in a little way.
Apple cider is the first thing that comes to mind when I think about holiday foods.

I feel like I've always been fond of spiced apple cider (cider in the american "cloudy apple juice" sense, not the british "fermented apple juice" sense). My grandma has made mulled cider in a big electric percolator (like you get coffee from at church, with the little spigot, not the big pump ones at coffee shops, and yes, that is an important detail) for long enough that I associate the smell with the words holiday, family, and warm, in that order. It's a great all-purpose holiday drink, and it's possible that she's served it for Thanksgiving, Christmas, and New Year, possibly in the same season. Then, I discovered that drinking Alpine spiced cider (and not that sugar free crap, no sir, it tastes like Theraflu, which tastes nasty), an apple-cider flavored drink that I'd enjoyed since childhood, actually helps me focus and perform well under stress.
Naturally, I tried to replicate my grandmother's cider for our flat Christmas party in England, since everyone was pining a little and bringing/making things that reminded them of Christmas at home. But mulling spices are expensive, and most of them smell like potpourri instead of holidays, family, and warmth, so I googled "mulled cider" and pieced everything together. The end result was a hot cider that smelled and tasted exactly how I'd hoped.

I'll attempt to replicate the recipe, although there was a lot of "dump half the bottle of cinnamon in by accident and scoop a bunch out" and "discover that you need to strain your cider; have tipsy flatmates help you slowly pour cider through a cotton tea bag" going on, and it was about a year ago. Actually, I think I'll ask my grandma what spices she uses and report that here later, and possibly add in an update if I attempt to repeat my England experience with less random dumping of spices (and fewer tipsy flatmates). This can be done with either cloudy apple juice type cider or probably non-carbonated hard cider, if that's a thing that exists. A significant amount of water (or, presumably, alcohol if you go the fermented route) will cook out, so be prepared to start with a lot of cider. A lot of this is based on personal preference. For instance, you could probably add ginger if you're a ginger fan. I don't really like ginger in my cider, so I don't use it. Besides, I don't think Grandma used ginger.

Starting with 1 gallon of cider makes about enough for 4 people to have two scant 8 oz mugs apiece. If you want to have a very specific number, it's 12 fl oz per generous serving, but just go with a quart per person if you're having a party. Nothing wrong with leftovers.
For a one-gallon batch:
1 gal cider
2 tsp cinnamon
1 tsp cloves
1 tsp nutmeg
1 tsp allspice
1 orange, sliced into rings
Generous splash orange juice, about 2 tbsp
Honey or sugar to taste, but honey is better

Pour the cider into an appropriately-sized saucepan and turn on the burner to medium heat.
Put spices into a fabric tea bag. If you have a favorite spice, add another 1/2 tsp of that spice. VERY IMPORTANT: The bag should be fabric, and not a tea ball or something metal because you will have to strain the hot cider if you don't start out with the spices in a fabric bag. Don't use a super fancy expensive bag, though, since it'll probably be unusable after this.
Splash in the orange juice -- the cider should be a little cloudy but mostly still apple cider-colored.
Toss the orange rings into the pot, rind and all. Just use as many orange rings as will fit comfortably on the surface of the liquid. You could probably use lemon or grapefruit if you want.
Drop in the bag of spices and make sure it gets all soaked through; pour some cider through it and close it back up if it's really stubborn. If you have cinnamon sticks or whole spices (whole cloves and presumably nutmeg and allspice can be purchased at your average supermarket in the baking aisle, check the bulk section if they have one), toss in a few now. They'll add some authenticity to your operation.
Heat on medium until it starts steaming and smelling apple-y and spicy (time will vary). Taste and add a few spoonfuls of honey (preferably) or sugar as needed. Add a few spices to the bag if needed, either to strengthen the general flavor or to balance the spices. It may also be a good idea to sprinkle a few pinches of your favorite spices straight into the cider if the flavor is really lacking.
Don't bring to a boil, but do get it good and hot and hold it there.

To break it down for just 1 serving, since that's a nice way to deal with a rainy day:
12 fl oz cider
1/4 tsp cinnamon
1/8 tsp each cloves, nutmeg, allspice
2 orange rings (eat the rest, they're good for you, or just chuck them in as well)
Small splash orange juice
Honey to taste

Saturday, October 27, 2012

Baking is hard when you're broke.

Fact of the day: life is expensive. If you haven't figured this out by now, you're either a very lucky person who gets all the jobs they can handle or you have rich parents. I have moderately well-off parents, but I'm kind of over asking for money, especially after I drained their funds when I went to England.
So, my grocery budget is shot for a while because I'm trying to pay rent and bills, and I owe my parents about that same amount for my computer. Bundled in with this is me not wanting to turn up the heat in the house because I am paying for 1/6 of it.
I'm baking more than usual because I can't really afford to buy new food. Unfortunately, the heat being on low means that yeast dough isn't really down with rising as fast as one might like.
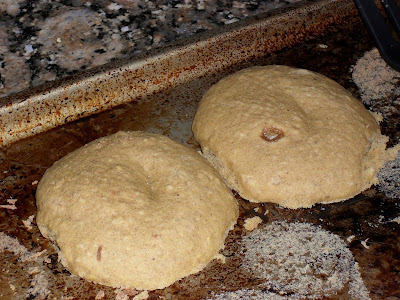
My pita bread was supposed to double in about an hour, but an hour and a half later, it's still just a mostly cold lump of dough instead of a big puff of warm dough. It's even sitting on the stove.
However, I figured out the problem. I'd wrapped the bowl in a damp towel (instead of my usual dry towel plus plastic wrap because the instructions called for it; that's the last time I try to follow instructions like that) and tucked the ends under to keep in the moisture, then set it on the stove (warm because the oven is on with my housemate's strange experiment). The warm damp towel in the cold room had cooled almost instantly, and the ends of the towel under the bowl had insulated the dough from the warmth of the oven with incredible efficiency.
Next time I try to follow weird instructions about how to rise dough, remind me that saran wrap plus a dry towel works wonders and that other methods are probably less useful, especially given my propensity for screwing things up in little ways.
Update on the dough: it's doing great now that the damp towel is firmly pressed around the bottom of the bowl and keeping the oven heat focused into the bowl. My dough is all big and puffy.
You may be asking yourself, why is she making pita bread if she seems to think that she can't afford heat? That seems kind of fancy for someone who, by her own account, is about to become a vagrant who doesn't even own her computer.
Well, I don't quite have enough flour for regular bread for longer than one week and I'm unwilling to pull too much money from my savings account (really sick of debt), and I do have falafel mix and beans and all manner of pasta and plenty of sauce and some peanut butter and potatoes, so a small, easy-to-store bread as a vehicle for falafel and possibly bean soups is just what I want.
And I've been kind of taken with the idea of pita bread for a long time (it was the first thing I pinned on pintrest when I set up my account this summer) and happen to have all the ingredients AND something to put in it.
I used a recipe from a cookbook, but this is the one that I pinned: DIY pita bread. My recipe required more rising steps (the whole blob of dough rises until doubled, then you split it up, then you let the balls rest, then you roll them out, then you let them rise for 30-40 min), but I feel like this is an equally valid recipe. My recipe also doesn't call for a stand mixer, which I don't have anyway. It works okay, although they're a bit crunchy. Still delicious, though.

Monday, October 8, 2012

Pumpkin All The Things and Pumpkin Apple Plum Bread

My housemate's family gave us a 75 lb pumpkin. This weekend, we tackled it. Well, C did the actual tackling. A (whose pumpkin it is) was at work, and no one else wanted to get in C's way.

Housemate Stabs Pumpkin
C has it in for that pumpkin.

We (by which I mean S) invited a bunch of people over (some of whom came), chopped it up, cooked it down in oven or on stove, strained the juice out and saved it (Harry Potter style!), and blenderized the cooked flesh.
That was the easy part. Well, I actually wasn't there for it, and L, S, and C did most of the work, but it can't have been too horrible compared to the hard part.
The hard part? I hear you cry. It's figuring out what to do with the tons and tons of pumpkin puree we have in our fridge and freezer. We also have a bunch of uncooked chunks of pumpkin in both locations.

Pumpkin Bread with cool lighting
Bread that I made up: Pumpkin Apple Plum Bread

Overly sugary pumpkin butter in a spaghetti jar.
Pumpkin butter that mostly tastes like brown sugar. Good in plain greek yogurt, though.

Pale, flattened pumpkin doughnuts.
Pumpkin doughnuts by C. She tripled the pumpkin, so they kind of went flat. Delicious, regardless.

Harry Potter food and british food in one delicious parcel!
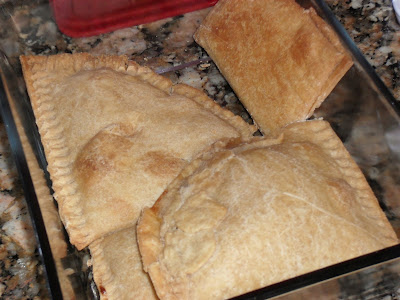
Pumpkin pasties, made with pie crust instead of puff pastry.

Half-eaten heart-shaped pie.
Pumpkin Pie in the heart-shaped cake pan.

Pumpkin juice in a pitcher and glass, artfully.
Pumpkin juice! We just strained the cooked pumpkin and didn't add apple juice or any spices.


Way too much pumpkin.
All the stuff we haven't cooked, minus a pound of uncooked stuff C took to a friend.
Pumpkin chocolate bread in a parchment paper-lined tin
I'm a parchment paper convert.

Pumpkin chocolate bread looking artsy and decadent
Pumpkin chocolate bread! Decadent.

So far, we've made 4 pies, 9 10 loaves of bread, 16 doughnuts, 4 doughnut holes, 9 pasties, a soup, and a batch of pumpkin butter, and we still. have. so. much. We did give away a bunch of the baked goods, but still! I'm afraid that we'll start gagging at the smell of pumpkin before this is over, and I'd hate for that to happen.
[NB: Don't add so much sugar to the pumpkin butter if you do it in the crockpot; it'll end up tasting like brown sugar even though it smells like pie. Also, it will probably smell like apples for a long time. Adding some fresh puree at the end and cooking it on low for about an hour works pretty well.]
My goal (aside from bringing NB over to the west coast of the US) is to find creative ways to use this stuff up. I might try some savory recipes, even though I'm not a big fan of the "pumpkin as a vegetable" thing. Short of that, although my housemate did try with the soup, I'm thinking about putting pumpkin in things we don't normally associate with pumpkin.
I'm thinking pumpkin crepes and waffles, and more types of bread. There's a thing called "pumpkin hot chocolate" that I want to try. Possibly a cheesecake. I'll also push for more doughnuts, but I'm not confident in my baked doughnut-making skills so we're at the mercy of my knife-wielding housemate there.
And may I just say that I friggin' love The Post Punk Kitchen? Other than the veganism, which I adopt only when I'm out of eggs, butter, and normal milk, they're pretty much exactly how I want to be. I'm a college student. More than that, I'm a science major. I have no plans to be a stay at home wife, and only very vague plans of every being a mom, much less a stay at home one, so my culinary aspirations are strictly in pursuit of frugality and wickedosity. I don't have time or money to cook extensively, so when I do cook, it had better be pretty badass. I cook because I can't afford $3 for a slice of bread, but that free pumpkin and less than $3 for miscellaneous ingredients I don't already have is something I can afford. Mostly I cook pasta, but sometimes there's an explosion of old-fashioned cooking and baking and two weeks' worth of soup and bread. If I'm going to cook, I'm going to use the most effective recipe I can find, and it will be delicious.
Incidentally, the chocolate pumpkin bread linked twice already is delicious, and I felt badass chopping up the dark chocolate (which my mom bought me when she was in town) because I'm too lazy and poor for normal chocolate chips.
Success!


The word "pumpkin" no longer looks like a word. I hope you appreciate this.

I made a loaf of quickbread that does not follow the recipe linked above (which S picked because it was the first hit on google); in fact, I made it up by myself with minimal help from the internet. And that was months ago, so this is adapted from a recipe adapted from several recipes to the point of not looking much like any of them. Besides, there are only so many ways to combine flour, leavening agents, and fruit and have bread happen.
This recipe can be vegan if you use a cornstarch egg; I'm wary of flax eggs for the time being because my pear bread (which followed this recipe, more or less, and used a flax egg) was pretty flat. I also forgot the salt in the pear bread, so I'm not sure who the culprit was; in fact, I might just not know how to make flax eggs very well, which results in pudding-like bread when combined with a lack of salt. Who knows.
Don't forget your salt.

Pumpkin-Apple-Plum Bread

Ingredients

  • 1 1/2 c flour
  • 2/3 c sugar
  • 1/2 tsp baking soda
  • 1/4 tsp baking powder
  • 1/4 tsp salt
  • 1 tsp pumpkin pie spices (cinnamon, nutmeg, and cloves in this case)
  • 2 medium baking apples, peeled, one grated and one cut into small chunks
  • 4 Italian prunes or 2 plums
  • 1 c pumpkin puree
  • 1/4 c olive oil
  • 1/2 tsp vanilla
  • 1 egg

Procedure

Preheat the oven to 350 F. Grease a 1 lb loaf tin (or 9" pie plate) or line with parchment paper.
Mix dry ingredients, up through the spices. Add more spices if you love cinnamon-y bread. I'm a little sparing with the spices because I hate it when all I can taste is cinnamon and I was hoping for pear or pumpkin, you know?
Peel and prep your apples into a bowl. I cut a soft gravenstein into small chunks and grated a hard granny smith. You could grate both, chunk both, or just use applesauce.
Cut your plums or prunes into small chunks. Leave the skin on, unless you hate color and beauty in your quick bread. Add to the apples. Alternatively, just use about 2 tbsp of your favorite jam.
Add pumpkin puree and the rest of the wet ingredients to apples and plums/prunes.
Mix wet ingredients well.
Fold wet ingredients into dry ingredients just until mixed.
Add chocolate chips if you have them and feel especially bold. I neither had them nor would have felt bold enough to do this.
Pour into prepared pan and bake for at least 1 hr.
Poke occasionally with a toothpick to see if it's done. There's a good chance you'll stab a chunk of fruit, so don't worry about plum-colored toothpicks.
Let sit for no more than 10 minutes before taking it out of the pan.

Alternatively, you could just use pumpkin puree or a mix of pumpkin and applesauce if you're not up for a chunky bread or don't have apples. Prunes/plums can be omitted without substitution if you're not feeling the red fruit thing. I'd say add another half cup of smushed cooked fruit if you omit the fresh fruit entirely, but add it after you've made the batter in case you don't need it at all. Tossing in a tablespoon or two of jam wouldn't hurt anything, either.

Note: This is not a terribly sweet bread, courtesy of the baking apples and the prunes. Add another 1/4c sugar if you want a sweeter, chunky bread. Don't add more sugar if you use sweetened applesauce or sweetened pumpkin, unless you like it really sweet.

Sunday, September 30, 2012

Italian Prune Butter

Remember those prunes I got?
Yeah, I made prune butter as soon as the crock pot was clean and I was awake. 
Here's the source: Eating Small Potatoes.
Here's what I used:
1 1/4 lb prunes (18 prunes)
Just about 3 oz sugar (approx 1/3 c)
1/4 tsp vanilla (actually about 1/3, but that measure doesn't exist, so I stuck with 1/4)
Here's the broken down ratio:
About 1/4 c sugar to 1 lb fruit, and 1/4 tsp vanilla per lb.

First, wash your prunes, halve, and pit them. Cut them into a bowl on a scale because you want to know how many prunes you used. End up counting the pits anyway.

Prunes!
Prunes halved and mostly pitted. They come out of the mix pretty easily if you can't get them out of the fruit itself.
 Second, work out the ratio of sugar from the website you found this recipe on. Decide that you'll use your scale to add sugar and not worry about tricky conversions between ounces and cups and pounds.
Add however much sugar you need. If you're using this website, put in 1/4 c sugar for each pound of prunes.

Prunes and sugar, tarting it up.
Prunes and about 3 oz sugar.
 Dump the mixture into the crock pot. Admire, and worry that the sugar will burn. Stir obsessively.

Prunes and sugar about to start cooking
Prunes and sugar in the crock pot. I was very anal about taking lots of pictures.
 The prunes will start making their own juice pretty much as soon as they get warm.  Feel relief, but still stir way too often.

Sugar and prunes gettin' busy.
The sugar has started to draw the juices out of the prunes.
 Become slightly enraged by the site of the crock pot with its lid on. Feel a deep, pressing need to remove it and observe its contents.
Resist this urge by going for a walk and then doing your housemate's workout DVD.

Crockpot with lid on drives baker insane.
This is the most maddening sight in the world. All I want to do is take off the lid and stir.
 Dance around the pot whenever you're not doing something else.
This is about a third of the way done. The skins are starting to come off and disintegrate, and the flesh is getting all smooshy.
NB: the flash on my camera was being dumb and made everything look much redder in the pot than it should have been. The flesh was a light yellow for most of the time while the juices were a purply brown that was pretty hard to distinguish from the black crock pot.

Prunes looking delicious
They're starting to stew in their own juices and make my pictures look funny.
 This is about half done. The flesh has almost formed a smooshy mass with some skins floating around and some juices still around the edges. By the end, you want those skins to be all the way dissolved into the smooshy stuff and no juice around the edge.

Mostly-cooked prunes
The fruits are all the way smooshified, with just some skins floating around.
 This is where I realized that I should probably have started this last night or woken up earlier. I don't have enough prunes to make a nice, thermally-stable butter that can sit in the crock pot overnight and not burn. I was thinking I would just set it to warm and deal with it in my mid-morning "lunch" break, but then I realized that I liked the taste and texture already.

Almost completely cooked prunes
This is more what the prunes looked like the whole time; but don't be turned off by the brown color. They are delicious.
 I added vanilla here. It adds a nice complexity to the flavor. I wouldn't recommend cinnamon, but if you have a thing for plummy things with a certain spice, go for it.
Then I let it sit for a few minutes and jarred it.

Homemade deliciousness in a borrowed jar.
The finished plum butter, in the ubiquitous used jam jar.
The butter that I got is less buttery and more jammy, with some half-dissolved skins still in it. It's tart, sweet, and tangy, with enough body to be a delicious spread. The vanilla blends well, but would not be required. I'd say that I got about 1 1/2 cups of butter; it might have gone down to 1 or 1 1/4 by morning.

EDIT: As a side note, I've decided that I NEED a tiny crock pot when I get my own place. I want a little one about half the size of A's so I can make 1-person jams and applesauces and suchlike. 

Fall Bounty

There's a co-op of farms near my university that J and I went to with her mom.
They're selling gobs of apples and also italian prunes.

Prune size comparison
Prunes as compared to a granny smith apple belonging to a housemate.

Also, huge "Flemish Princess" pears.
Pears in a bag
I'm going to bake with these because there's no way I could eat one in one day.


I have some big plans for my prunes and pears - slow cookers and ovens.

Pear size comparison
The same granny smith apple was used in all photos.
 I made applesauce from my housemate's slowly-going-off gravenstein apples and some other apples I scrounged from around my kitchen, which I'm not posting here for three reasons.

Homemade applesauce
1. Applesauce recipes, aside from being ridiculously simple, are a dime a dozen on the internet and in cookbooks. I used a different housemate's crock pot, cut a bunch of apples into it, poured a little apple cider because it kept seeming too dry, sprinkled in a little cinnamon, cloves, and nutmeg (to taste, but start very small), and sweetened with honey as I went along.

Applesauce2. I did not use a recipe, and I didn't write down what I was doing.

3. I didn't take any pictures of the process.

 If you want a recipe, just type "crock pot applesauce" into your search engine of choice and pick one that has ingredients you have.


I suppose I have big plans for my apples, but I just got itty bitty ones so I can eat them raw the way I like. It's not as difficult as it sounds, but suffice to say that I have a complicated-to-explain-but-easy-to-do method for eating fresh apples that doesn't work well on normal American-sized apples. I have to buy the bags of tiny apples at the store for it to work. And I eat all my apples that way if I don't bake them, so it doesn't really as a big plan.

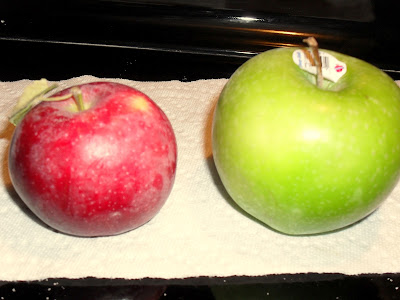
Apple size comparison
The red apple is one that I picked; the green one is the same one from earlier. I like tiny apples, okay?

Right now, I'm thinking about a carrot soup, prune butter (in the crock pot, no peeling required), pear bread, and olive oil bread (I just need a recipe for these last two).

Also, I'd like to elaborate on the prune/plum thing. I always thought prunes were just dried plums, which maybe they sometimes are. However, the prune fruit is similar but ultimately distinct from the plum fruit. Plums are big fat round juicy affairs, while prunes are skinny and comparatively dry. While I've never baked with plums, I can say that prunes are amazing in the oven. They're okay raw, but MAN are they good baked. I made a tart and it was pretty much a religious experience. They don't spread out via juices hardly at all, but that basically means that they keep all their goodness concentrated. I didn't even need to put in sugar or spices. In fact, had I done so, I'm sure they wouldn't have been as delicious.